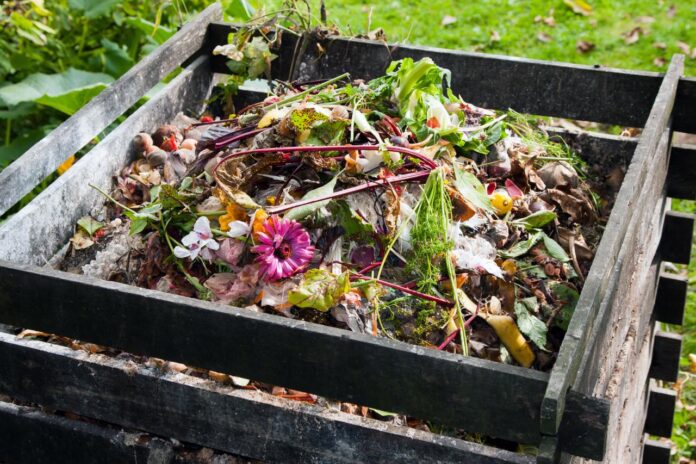
Have you ever thought about ways you could lessen carbon footprints? Are you worried most times at the amount of trash you and your household gets to generate every day?
I am here to tell you that there is a solution already to all of these problems and making a compost pile in your backyard is one of the effective ways which has proved to be beneficial not just to you but also to the environment as well.
Continue reading this post and find out the easy steps which can be taken when learning how to make a compost pile.
Interesting Review – How To Wipe Out Backyard Mushroom With Ease
Setting a compost pile in your backyard leads to having ready-to-use organic matter which comes in handy when adding nutrients to your garden as well as when trying to improve the structure of any soil.
What this also means is you would enjoy cost savings when spending on your family’s food budget and also enjoying a better harvest.
Making a compost pile in your backyard also helps in the fight against climatic changes as you are cutting down on greenhouse gas emissions which food tends to create in landfills. Let’s show you the composting steps right away;
Step 1- Seek For Permission First
Making compost pile might be environmentally friendly but at the same time, you would need to get permission from local authorities so you can go ahead and start making compost piles.
This permission can also be gotten from the homeowners association and you are likely to face certain regulations especially if you live in urban or suburban areas due to pest and odor concerns.
Step 2 – Site Selection
When picking a site, you would need to pick somewhere that is a bit far from residential quarters and this is due to the odors that making a compost pile in your backyard might produce.
An area with partial sunlight would be a welcomed idea and also have it at the back of your mind that a site that has a well-draining soil is best used as it offers the best conditions needed for decomposing.
Step 3 – Putting Together Your Starter Materials
The third step you need to take is putting together the raw materials which you would need in making the compost pile.
These raw materials are actually nitrogen and carbon and they are used because they tend to offer a base for microbes especially bacteria to get to work. Oxygen is also needed but that is already in the air and moisture is also very necessary because it enables microbes as well as other organisms to be able to survive on sight.
Paper waste, wood chips and leaves and great sources of carbon while grass clippings are a good source of nitrogen.
Other materials that you might consider adding when gathering your starter materials include;
- Coffee grounds
- Nutshells
- Vegetable and fruit peels
- Yard waste
- Spent annual plants
- Dead houseplants
- Pet waste
- Meat scraps
- Used cooking oil
Step 4 – Keeping It Well Secured
Your compost pile should have a form of barrier around it such as a wire fence and this is a very important step to not neglect because it makes sure your compost pile is well contained as well as making sure pets do not have access to such areas.
Other visible sides can also be blocked off using plastics and this also helps in making sure everything gets to heat up to 100 degrees.
Step 5 – Constructing A Foundation Layer
An excellent material that you can use to construct a very good foundation for making a compost pile in your background is a wood chip and this is because it works effectively to prevent weed from attacking your compost pile.
The foundation should be lightly moistened using a water can with a sprinkler nozzle or a garden hose and dousing be avoided so as to prevent displacing oxygen which microbes and bacteria need to survive.
Step 6 – Addition Of Nitrogen
Nitrogen can be added through the use of kitchen waste and scraps and a 4inch layer is required as it ensures the right base needed for decomposition.
Water should be sprinkled as well for moistening and never forget that a compost pile is considered to be a work in progress so always add more kitchen scraps from time to time.
Step 7 – Rinsing And Repeating The Process
Continuous alternation of nitrogen and carbon layers should be done until the compost pile reaches a waist-high level. That level is very necessary for generating heat and precipitation is bound to occur after watering.
However, do not forget to cover up the heap if you suspect the coming of a heavy downpour and also apply water if the compost pile starts looking dry.
Step 8 – Stirring Up The Mixture
Things are likely to get more compacted as the materials start to decompose and this compactness could lead to a reduction in the amount of oxygen present therefore slowing down the entire process.
It can also cause the production of unpleasant smell and all these happens because the bacteria do not have enough air anymore. What you must do is turning over the compost pile once every week using a garden fork or a shovel.
Step 9 – Humus
This is the end result of all the maintenance and work that you have put together. Humus is the end product of the decomposition of all the material that you have been mixing together.
This humus is what you would add to your garden for it to be able to thrive. Humus however has a pleasant and earthly smell and you make use of a hoe or rake in applying it in your garden.
Final Words
One way of getting rid of scraps and also providing your garden with all the nutrients that it deserves is through the making of a compost pile.
Making compost pile just like we stated at the beginning of this article helps in cutting down greenhouse gas emission and household waste.
The lucky part of all this is learning making a compost pile in your backyard isn’t expensive or difficult and we have all the steps discussed in this review so you wouldn’t find the process challenging.
Related Post – Easy Ways To Deal With The Growth Of Poison Ivy In Your Backyard


